A Role is a group of permissions. You can associate users to one or more roles, and edit those associations at any time.
NOTE: If you want to see what permissions a role has before associating it, see View / Edit Role Permissions.
How to Add / Remove a User's Role Association
- Access the User Table by pressing the dot (period) on your keyboard and selecting User from the Quick Actions drop-down list.
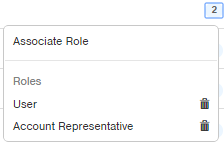
- Notice the Additional Roles column. The number in the column indicates how many roles the user is currently associated with. Click the number next to the user whose role assignment you want to edit. A drop-down displays showing existing roles (if any). Here is an example:

-
To remove a role, click the trash can (
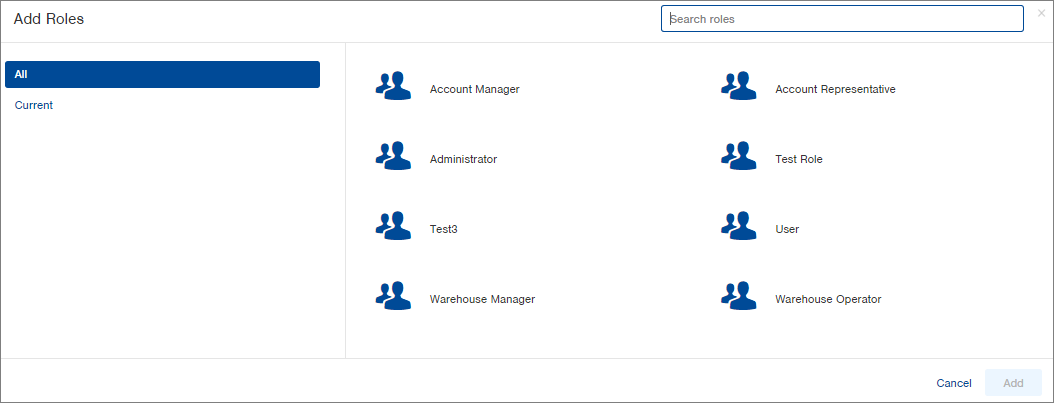
To assign a role, click the Associate Role option in the drop-down menu. The Add Roles window appears: ) that appears to the right of the role. The role will be removed.
- All roles will display on the right. NOTE: Click "Current" on the left to see the user's current role assignment.
- From the list of roles on the right, click on the role you want to assign to the user. NOTE: You can only select one role at a time, but you can return to this screen to select additional roles.
- Click Add. The role will be added to the user. If you need to add more roles, click the number in the Roles column and associate another role.
Pro Tip: To edit the default role, the user must already be associated with the role you wish to apply prior to editing.

-1.png?height=120&name=InfoPlus-Primary-Logo%20(1)-1.png)