- Knowledge Base
- Getting Started
- Step 6: Smart Filters & User Reports
-
Getting Started
- Setting Up Your Test Site
- Step 1: Warehouse Configuration
- Step 2: Hardware Configuration
- Step 3: Setting Up Shopping Carts, Integrations, and EDI
- Step 4: Dashboard and Navigation
- Step 5: Item Configuration
- Step 6: Smart Filters & User Reports
- Step 7: Mobile Floor Apps
- Step 8: How To Receive and Put Away
- Step 9: Inventory Management
- Step 10: Warehouse Documents and Printing
- Step 11: Navigating Orders
- Step 12: Order Fulfillment / Picking
- Step 13: Packing and Shipping
-
Tutorials
-
Troubleshooting
-
Use Cases
-
Videos
-
Modules & Features
-
Glossary
-
Connect to Support
-
Infoplus Community Forum
How to Add a Description and Edit a Smart Filter's Name
Having a proper smart filter Name and Description helps you quickly determine what the smart filter is intended to display.
Descriptive information is particularly helpful when sharing smart filters.
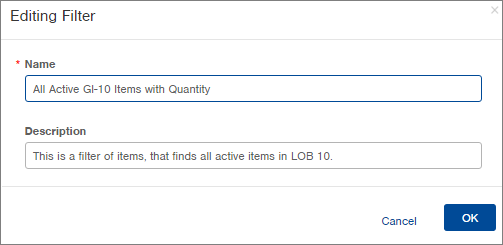
Here is a sample smart filter Name and Description:

Add a Description and Edit a Smart Filter's Name
- Access the Manage Smart Filters screen.
From within a table, select Smart Filters > Manage Smart Filters; or
From a page displaying the Favorite Smart Filters section, click the gear icon ( ) next to the section and select Manage Smart Filters.
 - Rest your mouse on the Smart Filter and click the double arrows icon (
 ) that displays at the end of the record.
 - Click Edit. The Editing Smart Filter window appears.

- Edit the smart filter's Name and/or Description.
- Click OK.
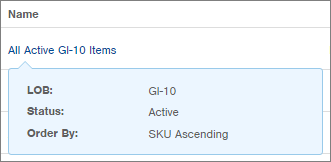
NOTE: To view a smart filter's criteria in the Manage Smart Filters window, click on the Smart Filter Name. A blue popup will list the smart filter criteria. Here's an example:
-1.png?height=120&name=InfoPlus-Primary-Logo%20(1)-1.png)