- Knowledge Base
- Getting Started
- Step 5: Item Configuration
-
Getting Started
- Setting Up Your Test Site
- Step 1: Warehouse Configuration
- Step 2: Hardware Configuration
- Step 3: Setting Up Shopping Carts, Integrations, and EDI
- Step 4: Dashboard and Navigation
- Step 5: Item Configuration
- Step 6: Smart Filters & User Reports
- Step 7: Mobile Floor Apps
- Step 8: How To Receive and Put Away
- Step 9: Inventory Management
- Step 10: Warehouse Documents and Printing
- Step 11: Navigating Orders
- Step 12: Order Fulfillment / Picking
- Step 13: Packing and Shipping
-
Tutorials
-
Troubleshooting
-
Use Cases
-
Videos
-
Modules & Features
-
Glossary
-
Connect to Support
-
Infoplus Community Forum
Add Dimensions to Items (for Cartonization)
In order to utilize the automation and speed benefits that come with Cartonization, you will need to add dimensions to all your items first.
Add Dimensions to Items (for Cartonization)
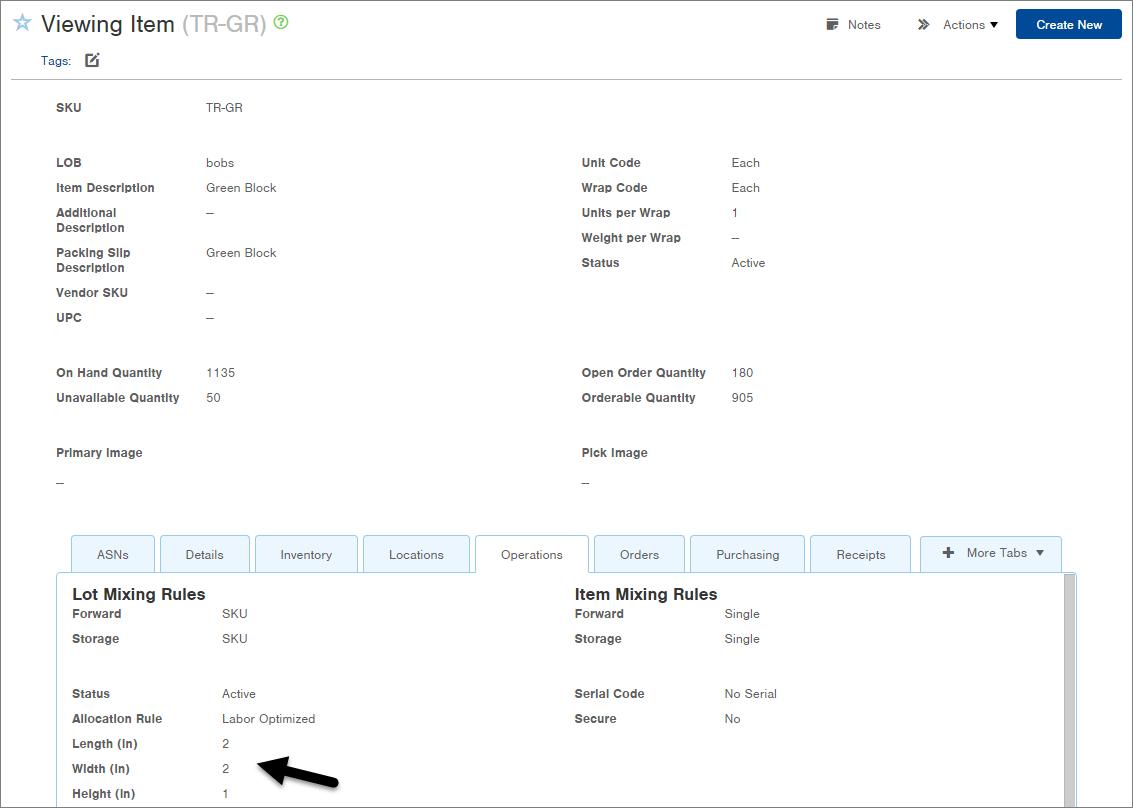
Item dimensions (length, width, height) are required in order to cartonize orders. Item dimensions are part of the Item record.

Add Dimensions to an Item
- Access the “Item” table. Two methods:
- From the Dashboard: Click the “Warehouse Operations” tab, click the “Item Management” App, then click the “Item” Table.
- From the Quick Actions shortcut: Press a dot (period) on your keyboard, then select "Item” from the list of Quick Actions.
- Click on the item that you want to edit.
- Click the Edit button in the bottom right. The "Editing Item" window appears.
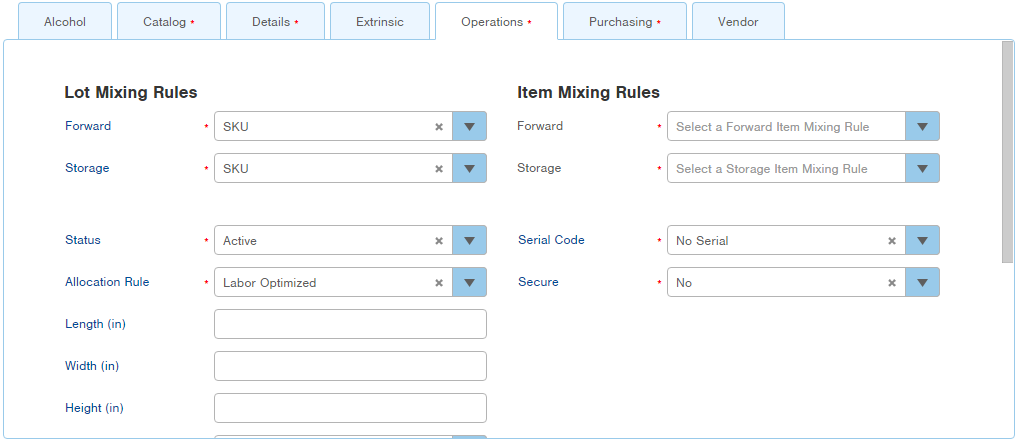
- Scroll to the bottom of the record and click the Operations tab.

- Enter the item's dimensions into the Length, Width, and Height fields. Consider dimensions as if the item was a rectangle, and type dimensions in inches.
- Click Save. The item is saved.

-1.png?height=120&name=InfoPlus-Primary-Logo%20(1)-1.png)